Three Controllers to Rule Them All (that just doesn’t have the same ring to it, does it?)

So we’ve got an NSX Manager now, and the uber-cool nsxcli, so what’s next? We need to build out the control plane, which means it’s NSX Controller time.

We can do this the easy way, or the hard way. We’ll talk about both. But first, let’s think about NSX and what the Controllers do.

The Control Plane is broken up into two main pieces: the Central Control Plane (CCP) and the Local Control Plane (LCP). The Control Plane programs the data plane and maintains the current, or realized state of the network.

That sounds rather similar to NSX-V controller nodes, doesn’t it? That’s because it maintains the same general purpose of the controllers in NSX-V. Except it does more. For example, when DFW rules are published, they are published from NSX Manager to the NSX CCP, and the CCP is then responsible sending the rules to the Local Control Plane for data plane programming.

Another difference is that the interaction between NSX Manager and the controller nodes is that they communicate via a RabbitMQ message bus, not private APIs.

So far, so good. Let’s think about another change: Controller sizing. In NSX-V, each controller had 4 vCPUs, 4 GB of RAM, and (according to my lab) a 28 GB virtual disk. NSX-T, again, provides some sizing flexibility:

  • Small: 2 vCPU, 8 GB RAM, 120 GB disk
  • Medium: 4 vCPU, 16 GB RAM, 120 GB disk
  • Large: 8 vCPU, 32 GB RAM, 120 GB disk.

Why would I use the different sizes, you might ask? Well, Small is generally for labs or proof of concept deployments. Generally, Medium is a good starting point. And Large, well, how big of a shop are you in? You might need it, though.

If you’re looking at your home lab or other small lab environment, you can get away with a single controller, just like NSX-V. Just don’t blame me when something doesn’t work.

For all the general similarities between the Controllers in NSX-V and NSX-T, T introduces some pretty significant under-the-hood changes that have enabled some pretty nice modularity in the Controllers themselves.

So how do we get these things up and running? I mentioned an easy way and a hard way earlier.

The easy way is to just have NSX Manager deploy the entire Controller cluster for you.

In the NSX Manager web UI, go to System > Components, and click on the “Add Controllers” link. NSX Manager will deploy the controller nodes and configure them for you based on your inputs. The downsides to this are that it only works with vCenter, and it only deploys Medium-sized Controllers. You’ve got to go to Fabric > Compute Managers and add your target vCenter server so that NSX Manager has someplace to deploy these virtual appliances. Great for quick deployment, terrible for a small lab environment.

So we have to look at things the hard way for a number of other use cases. Proof of concept, KVM-only shops, big shops that need Large controllers, etc.

To deploy your controller nodes manually, just grab the OVF (or .qcow2, if you’re in a KVM shop) and deploy it. If you’re deploying the OVF, you provide the same kinds of information you provided for the NSX Manager deployment – admin, auditor, and root passwors, network identity, etc. There are some options to add managment plane configuration, as well, should you choose to go that route.

Once they’re deployed, you need to join the controllers to the managment plane. Before we do that, we need the API thumbprint from NSX Manager (we collected that here).

Then it’s a simple matter of running the “join managment-plane” command and passing it the IP address of NSX Manager, the admin username and password, and the API thumbprint. On all of the controllers, we should set the controller cluster security model. Right now, the only option is a shared secret. We run the “set control-cluster security-model shared-secret secret” command to do that.

On the first controller, run the “initialize control-cluster” command to, well, initialize the controller cluster.

From the remaining two controllers, get the certificate thumbprint (“get control-cluster certificate thumbprint” on the controller node). With that information, we head back to the first controller (where we initialized the cluster), and join the other two nodes with the “join control-cluster” command, passing the target controller IP address and thumbprint.

We need to go back to the second and third controllers (one at a time) and run the “activate control-cluster” command. All this work, and we finally have our managment and control planes set up and ready to go. How about that?!

We’re almost ready to build logical network constructs. Almost.


~$ history
Introduction: From NSX-V to NSX-T. An Adventure
NSX-T: The Manager of All Things NSX
The Hall of the Mountain King. or “What Loot do We Find in nsxcli?”

The Hall of the Mountain King. or “What Loot do We Find in nsxcli?”

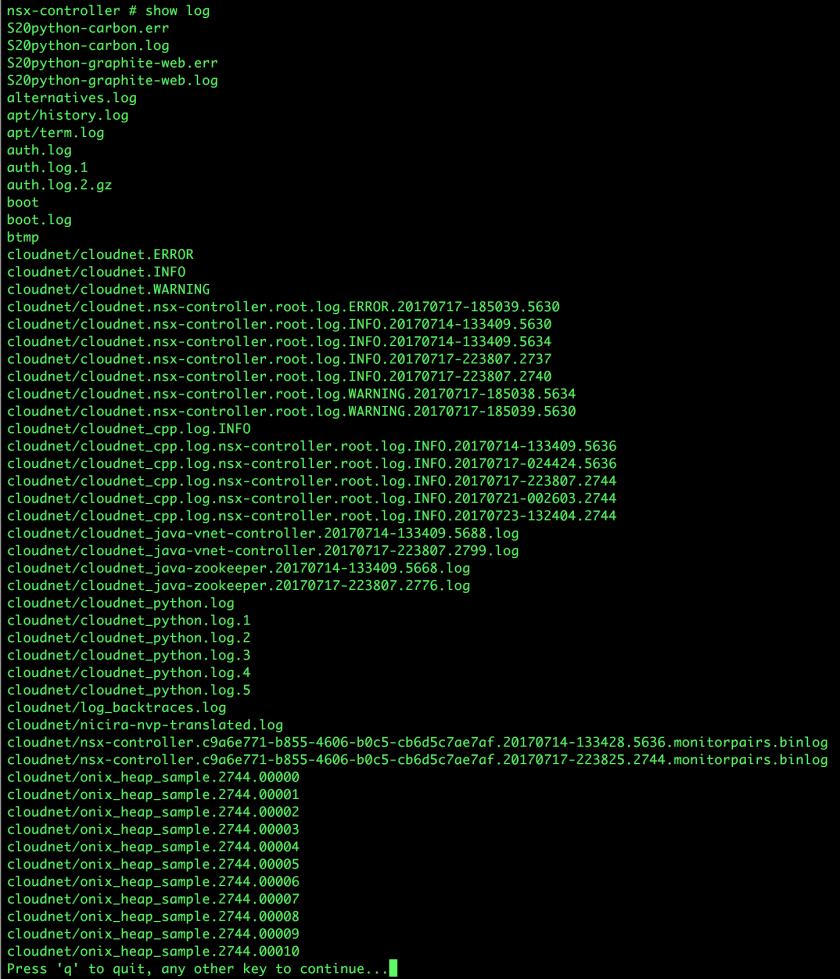
As we start thinking about NSX Manager, we need to think about the CLI. There’s a lot of stuff we might do there. Configuration, for example. Or Controller Cluster creation. Or other information gathering for troubleshooting.

The nsxcli is nicely organized, and ported across devices, so you get a similar (not identical) set of CLI tooling wether you’re at the Manager CLI, Controller, Edge, ESXi, or Linux. The tooling implemented in nsxcli is context sensetive, so things like “get controller-cluster status” don’t exist on the Manager.

Another fantastic thing about nsxcli is that it’s tab-completable. So I can start a command, hit <tab> <tab> (yep, twice), and a list of suggestions pops up. And if I get stuck later in the command, I can do it again.

The nsxcli is structured pretty simply: VERB NOUN. Sort of like Powershell. The pieces of the command are space-separated, rather than hyphen separated. But there’s more than just verbs and nouns. Let’s take a quick look:

nsxmgr-01> <Tab>Tab>

  clear       Clear setting

  copy        Copy from one file to another

  del         Delete configuration

  detach      Detach from NSX cluster

  display     Display packet capture file

  exit        Exit from current mode

  get         Retrieve the current configuration

  help        Display help

  list        List all available commands

  nslookup    Name server lookup

  on          Run Central CLI command

  ping        Send echo messages

  reboot      Reboot system

  restart     Restart service

  resume      Resume node upgrade

  set         Change the current configuration

  shutdown    Shutdown system

  start       Start service

  stop        Stop service

  traceroute  Trace route to destination hostname or IP address

  verify      Verify upgrade bundle

When you get your suggestions, you even get  some nice descriptions to get started. What really starts getting interesting is when we look at the get (and set) commands.

nsxmgr-01> get <Tab><Tab>

  all                 All items

  arp-table           ARP entries

  auth-policy         Authentication policy

  capture             Packet capture

  certificate         X509 certificate

  cli-timeout         CLI timeout

  clock               Manage the system clock

  configuration       Configuration details

  cpu-stats           CPU statisticsa

  eula                End User License Agreement

  file                File

  files               Files

  filesystem-stats    Filesystem statistics

  hardening-policy    Hardening Policy

  hostname            System’s network name

  interface           Interface configuration

  interfaces          Interface status and configuration

  log-file            Log file

  logging-servers     Syslog logging servers

  management-cluster  Management cluster

  memory-stats        Memory statistics

  name-servers        Name servers

  network-stats       Show system network stats

  node                Node

  nodes               Nodes

  ntp-server          NTP server

  ntp-servers         NTP servers

  processes           System processes

  route               IP routing table

  routes              IP routing table

  search-domains      DNS search domains

  service             Node service

  services            Node services

  sockets             Open IP sockets

  support-bundle      Support bundle

  upgrade-bundle      Node Upgrade bundle

  uptime              Show system uptime information

  user                Configure system passwords

  version             System version


nsxmgr-01> set <Tab><Tab>

  auth-policy       Authentication policy

  banner            Login banner

  cli-timeout       CLI timeout

  eula              End User License Agreement

  hardening-policy  Hardening Policy

  hostname          System’s network name

  logging-server    Syslog logging server

  name-servers      Name servers

  ntp-server        NTP server

  route             IP routing table

  search-domains    DNS search domains

  service           Node service

  snmp              SNMP service

  timezone          Timezone

  user              Configure system passwords

This is where we do most of the work with NSX Manager at the CLI. For example, we’ll need the API certificate thumbprint to join nodes to the management plane. That’s pretty easy:

nsxmgr-01> get certificate api thumbprint

88710fcd3fd84686cc6cc03b22298a1f84b9784b9f49bb869e889d632b3c2b22

We can get the status of the managment plane (and a little bit of info on the control plane as well)

nsxmgr-01> get management-cluster status

Number of nodes in management cluster: 1

– 172.20.40.42     (UUID 4c832d42-2dbb-3e12-2174-ef514037e38e) Online


Management cluster status: STABLE


Number of nodes in control cluster: 3

– 172.20.40.31     (UUID 5aeb415e-8dd5-40d2-aec4-2ab96dfaac68)

– 172.20.40.33     (UUID 8c2404e7-2503-497f-9c29-4fc8c4b0b2cb)

– 172.20.40.32     (UUID fd1a94fb-833e-4533-9e6f-b4c324f7f495)


Control cluster status: STABLE

I recommend spending some time exploring what we have here. It’s a rather powerful set of tools that are very easily accessible.

But the Manager is not the only NSX component we can interact with here.  That’s right, we’ve implemented a centralized CLI in NSX-T!  This is not the same kind of central CLI we have with NSX-V, though, where there are a specific set of commands we can use.  This is better.  Immensely better!

In NSX-T, I essentially tell the CLI:

On <node> exec <insert nsxcli command here>

The very cool thing about this, like I said earlier, is that nsxcli exists on all of your nodes. When you log into NSX Manager, NSX Controller, or NSX Edge nodes as user “admin”, you’re using nsxcli.  When you’re logged into an ESXi host, simply type “nsxcli” (/bin/nsxcli if you’re curious about the full path).  On Linux KVM hosts, it’s in the same place.  Note that on ESXi and Linux, you need superuser privileges.

Also recall that I mentioned that it’s context-sensitive.  In other words, I don’t have “get management-cluster” from nsxcli on an ESXi host.  But I have “get logical-switches”, which isn’t available on NSX Manager.

Just like everything else in NSX-T, nodes have a UUID.  So how do I find those?  That’s easy!

nsxmgr-01> get nodes

UUID                                   Type  Display Name

8c2404e7-2503-497f-9c29-4fc8c4b0b2cb   ctl   nsxctrl-03

5aeb415e-8dd5-40d2-aec4-2ab96dfaac68   ctl   nsxctrl-01

fd1a94fb-833e-4533-9e6f-b4c324f7f495   ctl   nsxctrl-02

92fcc10c-cae7-4013-8948-62bb7a1c2538   edg   edge-01

a3e9bc0a-74a4-4ab2-b886-73ae05aed11b   edg   edge-02

59291ac7-203d-4d5c-bd57-10a0496d0db9   esx   esxi-01.sd.vclass.local

1ca3279f-5f5d-4009-9318-64dfb8e8841c   esx   esxi-02.sd.vclass.local

bb84cad3-00cf-45d3-b336-aee6ce5943f2   kvm   kvm-01.sd.vclass.local

65a7e954-6312-42e8-8ac5-4b352ae01db0   kvm   kvm-02.sd.vclass.local

4c832d42-2dbb-3e12-2174-ef514037e38e   mgr   nsxmgr-01


So let’s build that out a little bit.  Here’ I’m telling NSX Manager “ On node esxi-01.sd.vclass.local, execute”, and tab completion tells me the things I can do (by the way, you can even tab complete node UUIDs!):

nsxmgr-01> on 1ca3279f-5f5d-4009-9318-64dfb8e8841c exec <Tab>Tab>

  clear     Clear setting

  detach    Detach from NSX cluster

  exit      Exit from current mode

  get       Retrieve the current configuration

  help      Display help

  join      Join NSX cluster

  list      List all available commands

  reset     Reset settings

  set       Change the current configuration

  start     Start service

  <CR>      Execute command

  |         Output modifiers

If I add the “get” verb to the command and tab complete, I’ll get all kinds of information I can gather:

nsxmgr-01> on 1ca3279f-5f5d-4009-9318-64dfb8e8841c exec get <Tab>Tab>

  bridge               Bridge

  bridges              Bridges

  capture              Packet capture

  controllers          NSX controllers

  firewall             Firewall configuration

  host-switch          Host switch

  hyperbus             HyperBus configuration

  logical-router       Logical router

  logical-routers      Logical routers

  logical-switch       Logical switch

  logical-switch-port  Logical switch port

  logical-switches     Logical switches

  maintenance-mode     Maintenance Mode

  managers             NSX managers

  node-uuid            Node UUID

  service              Node service

  version              System version

  vif                  VIF

  vswitch              vswitch

Long story short, the NSX CLI is powerful, extensive, and it might be frequently used. Spend some time with it.  Explore it!

Now that we’ve got that out of the way, let’s dive into the rest of NSX-T!

~$ history
Introduction: From NSX-V to NSX-T. An Adventure
NSX-T: The Manager of All Things NSX

NSX-T: The Manager of All Things NSX

You’ve seen it before. The monolithic NSX Manager from which all VMware SDN is spawned. The API endpoint. Provider of the UI. NSX Manager is the centerpiece of the world of NSX.

Welcome back to my adventure in moving from NSX-V to NSX-T!

NSX-T, just like NSX-V, is split into three functional planes: Managment, Control, and Data.

The Managment Plane is mostly the NSX Manager, but it also includes Managment Plane Agents on the hosts. The Managment Plane is a lot of things: my source of truth for network configuration, the persistent repository for the network state that I want, the API and UI provider, and more.

Just like in NSX-V, you deploy the NSX Manager as a virtual appliance. VMware ships the appliance in two different formats now – OVF and qcow2. You see, NSX-T is not nearly as beholden to vSphere as its cousin NSX-V. NSX-T is perfectly happy without VMware’s hypervisor and management stack. You can run happily with only RHEL or Ubuntu as your KVM platform, should you desire. This makes NSX-T a great option for those driving OpenStack for their private SDDC plaftorm.

There are so many more options in the OVF deployment now – 4 different size options (Small, Medium, Medium Large, and Large)

Small – 2 vCPU, 8 GB RAM, 140 GB disk
Medium – 4 vCPU, 16 GB RAM, 140 GB disk
Medium Large – 6 vCPU, 24 GB RAM, 140 GB disk
Large – 8 vCPU, 32 GB RAM, 140 GB disk

You get to choose your managment network (as usual), and decide whether your managment will run on IPv4 or IPv6.

3 sets of passwords for the admin, root, and audit users (yep, you have easily accessible root access here!). You can also specify different usernames for the admin and audit roles, if you don’t like the defaults.

Then you’ve got the host identity and role. Standard IP address and hostname stuff here, with the addition of the NSX role. Here, again, you have choices:

nsx-manager: This is the NSX Manager we know and love. The focal point for UI and API interaction.

nsx-policy-manager: Want to start automating security policies and the like? You need one of these, too (yep, a second appliance).

nsx-cloud-service-manager: Got NSX Cloud? Then get one of these.

nsx-manager+nsx-policy-manager – this multi-role option is only supported on VMConAWS deployments – don’t try this on-prem.

Finally, you set up your DNS configuration, NTP, and whether you want to allow SSH logins. And then you wait a minute for everything to deploy.

Once your done deploying, you can power on that bad boy of a VM. BTW, the memory is all reserved , so watch out.

Next step, logging into the web interface. Just point a browser at your NSX Manager IP or (preferably) hostname, and login with the admin credentials you just set during deployment. You’ll be presented with a beautiful Clarity-driven UI, with a dozen tiles for varying functions at the landing page.

Here, we can get into all kinds of trouble, from configuring load balancers to logical switches. But we’ve got more setup to do by deploying the Central Control Plane. We’ll get to that in another segment.

Before we get into all that, however, stay tuned for the next part in this series – I’ll take you on a tour of the NSX Manager admin CLI and show off some useful tools.

~$ history
Introduction: From NSX-V to NSX-T. An Adventure

From NSX-V to NSX-T. An Adventure.

I posted a while ago that NSX-T is the future, and the future is now.

And I entirely stand by that statement. While NSX-V is currently the software-defined networking standard at VMware, its time will come.
NSX-T is the architecture of the future. It’s the platrform for both NSX Data Center and NSX Cloud. The tooling you will use to define your networking and security capabilities and policies consistently between on-prem and off.

As it stands, today, NSX-T is really more for developer clouds. It has different capabilities than NSX-V, though the gap is shrinking dramatically with each release – NSX-T 2.2.0 can do an awful lot of cool stuff, and much of the stuff you may be accustomed to doing now with NSX-V. The proverbial “tomorrow” is close, indeed, and tomorrow, NSX-T will take the crown as king of the VMware SDN kingdom. Fortunately, this is not going to be a coup, but rather a peaceful transition (well, maybe not if you want to migrate in-place, but that’s a whole different discussion).

What I want to do in this series is to lay out the similarities and differences of the two platforms, as they stand today (NSX-V 6.4.1 and NSX-T 2.2.0). I will not cover positively everything – just what I would consider the basics. That’s still a significant list – my outline is crazy right now. Maybe it’ll become more manageable, maybe I’m just going to spend an awful lot of time writing. Hopefully, I will provide the information you need to essentially translate your NSX-V vocabulary to NSX-T.

That’s the goal. Remember, this isn’t going to be deep technical content – just a whirlwind tour through the new platform with comparisons to what you’re already familiar with.

I won’t be getting into the API, as that’s just not my wheelhouse right now – I can spell JSON, but not much more than that. So I won’t be covering cool stuff like Dashboard customizations, but there’s plenty for me to work on without that.

Join me on my journey through the wilds of NSX, here’s to hoping that we’ll both learn something!

~$ history
Introduction: From NSX-V to NSX-T. An Adventure
NSX-T: The Manager of All Things NSX
The Hall of the Mountain King. or “What Loot do We Find in nsxcli?”
Three Controllers to Rule Them All (that just doesn’t have the same ring to it, does it?)
Beyond Centralization: The Local Control Plane
Transport Zones, Logical Switchies, and Overlays! Oh, My!
Which Way Do We Go? Let’s ask the Logical Router!
If You’re Not Living on the Edge, You’re Taking Up Too Much Room
Welcome to the Edge, I’m at Your Service
Tooling and Operations

Well, that escalated quickly…

Ok, so not really. I’ve been thinking about this for a month or two now. I’ve replaced my 2016 MacBook Pro with Touch Bar with, well, a 2013 Mac Pro…and I’m not looking back.

“But John, you travel! How will you work while you’re on the road?” you may be asking. I can’t tell you how much I like my iPad Pro. That’ll be upgraded to a 10.5” shortly – I think that’ll be just right.

Here’s the thing. My job role is changing. Much of that is driven by me. I want to get off the road. I have a new house (and acreage to maintain – that takes time!). My wife and I are raising our grandson. I need to be home more.

Some of it is definitely being driven by the business, too. Education is working on some cool video-based products. And I have most of a studio set up already. It lines up nicely with what I want to be doing.

So if I’m not traveling so much, what am I doing? I’m creating. I’m actually hoping to make this a much more frequent destination for my time. I spent the two months after VMworld kicking out an NSX Micro-Segmentation course. Nothing fancy, but you should go check it out if you haven’t had any NSX training – I think it’s great! Right after we got the first delivery of that out of the way, I made a temporary move to our Curriculum Development team. We’re cranking out new NSX classes, and we’re trying to make ‘em awesome. So there’s a lot of work going into that.

But is that all? Of course not. VMware Learning Zone is a big thing for us right now. You should check that out, too. I’m recording content for that (when time allows). Nothing major right now, but definitely more in the pipeline.

And then, with all of this content creation work I’m doing, I got Scrivener back out, and actually started learning how to use it in earnest. This is one of the greatest things I think I’ve ever found. I can create content until I don’t want to create anymore, and I can do whatever I need to do with it. I think more importantly, it’s helped me start actually organizing thoughts into consumable snippets, and gives me a platform on which to build.

So this has driven me to a change in my daily driver. Earlier this year (once the hype chilled out a bit), I got my hands on a sweet MacBook Pro with Touch Bar. And I _love_ it. I’ve read lots of complaints about the Touch Bar, and whether it’s useful – I hope Apple will be launching a Magic Keyboard with Touch Bar soon. Seriously.

The MBP doesn’t quite fit what I need right now. I bought an OWC Thunderbolt 3 dock to go with it. Which is spectacular. I’ve got my old Thunderbolt Cinema Display rocking out a big screen, and I just picked up a Dell U3417W as a primary display. I do kinda miss the HiDPI joy of Retina displays, but the amount of real estate I have now is unreal, and I’m ok with the tradeoff.

The tradeoff I’m not cool with anymore is the lack of resources for portability. My MBP has 4 hyperthreaded CPU cores, and they’re fast. But they’re not enough for me. I also maxed this thing out at a whopping 16 GB of RAM. Still not enough. Storage, I bumped to a full terabyte, and that’s groovy, but I’ve also got my Synology hanging around in the background for more space if I need it.

With all of this content I’m working through (and the tooling and processes we use), I have a full-time Windows VM I have to run, and I want that to be responsive, so that’s chewing up more than half of my resources right now. And then there’s Camtasia, Logic Pro X, and any other editing tools I need when I’m doing audio or video. And Mail, and Scrivener, and more than one web browser, and whatever else I’m running.

So I took advatage of Other World Computing’s online store (and Black Friday/Cyber Monday), and found a heck of a deal on a trash can Mac Pro, adding another 2 Xeon cores and twice the RAM of the MacBook Pro. Sure, I’m getting what should be considered an old machine, but for what I want to be able to do, it makes a ton more sense. The current Pro certainly doesn’t fit everyone’s use case, but it works great for what I want and need it to do. And I can add memory. Holy crap I miss having that flexibility!

Will I be frustrated late in 2018 when a new Mac Pro is launched? Sure. Am I upset that I’m not waiting another few weeks to get my hands on an iMac Pro? Nah, but that’s an envy-inducing rig right there. I wonder if I can make a business case for my next machine refresh at work………..

Do you know what I’m gonna miss, at least a little bit? Of all things, USB-C. And the Touch Bar, but since I’ve been using the MBP essentially as a desktop, that’s been hidden away from me for a couple of months. But I’m really digging USB-C, for all it’s little gotchas. I like it. And I won’t have any more of it until I refresh this new (old) machine in a while. By then I’m sure we’ll be on a whole new USB spec. And Thunderbolt 4.

Anyway, I’m back to the desktop for a while. I can do everything I need to on the road with my trusty iPad Pro, Pencil, and Smart Keyboard (oh, don’t forget the Spotlight).

What’s out there looking forward? Content. Content on all things NSX. And whatever else I come up with. And I’m going to try to put some here. I’ll see you on the flip side!

NSX Controller Logs

Have you ever wondered what log files matter for day-to-day troubleshooting on the NSX Controller nodes?  There are certainly a plethora to choose if you just type show log and press ‘Enter’.

If you haven’t looked at the new VMware Documentation site yes, I encourage you to check it out.  There’s a whole new layout.  Once you get accustomed to it, I think it’s actually easier than the old web-based documentation.

Anyway, I specifically wanted to call out the NSX CLI Cheat Sheet 1 that’s in the documentation, which walks through common things an NSX Administrator may need to know.

In the Troubleshooting and Operations course, we mention NSX Controller logs a couple of times, and I’d like to expand on that content just a bit.

syslog is, well, the core OS system log.  Not entirely unlike any other Linux system. In addition to the standard logging content, however, some HTTP access logs are also included.

Then, there’s the Zookeeper log (cloudnet/cloudnet\_java-zookeeper<timestamp>.log). This log contains the logged data related to the Zookeeper process that enables NSX Controller Clustering. Some things you may see in this log are disk latency warnings, that could indicate issues with Controller syncing:

Finally, we have the core NSX Controller log file, cloudnet/cloudnet.nsx-controller.root.log.INFO.<timestamp>. This file contains a wealth of information about the operation of the NSX Controller. Let’s look at some of these messages individually.

What we’re seeing in the above screenshot is an issue with the Controller cluster. Fortunately, it’s very short-lived and does not trigger a control plane issue. The Controller Cluster can’t find any functional nodes, so it announces that the cluster will shut down in 30 seconds. This will trigger all connections to this surviving node to drop, causing a control plane outage. A cluster member, however, joined before the 30 second timer completed. The cluster shutdown is aborted, and the Sharding Manager is invoked to distributed slices to the new cluster member.

The next image simply shows us a VTEP Leave Report being acted upon by the Controller:

Here’s an interesting one:

What we see here is that a host sent a VTEP Join Report to the Controller, but the VTEP was already joined to the VNI. If we look carefully, we see that the existing VTEP Join Report came across Connection ID 7 (connId=7), while the new, conflicting report came across Connection ID 8. Also worth noting here is that the control plane sync state for the original VTEP Report was good (isOutOfSync=False), where the new connection has not yet resynchronized its control plane (isOutOfSync=True).

And have you ever wondered about hosts sending ARP information for VMs after the VM has been identified? Take a look at this:

There’s a lot to look at when you get into log analysis, but once you can narrow down the important files, interpreting them is actually pretty straightforward.

  1. https://docs.vmware.com/en/VMware-NSX-for-vSphere/6.3/com.vmware.nsx.troubleshooting.doc/GUID-18EDB577-1903-4110-8A0B-FE9647ED82B6.html

Lab Network

So I’ve had a few questions about the network in my lab, since I’m teaching almost nothing but NSX these days.  So let’s talk about it for a bit.

My network is purposefully simple.  And I’ve just rebuilt pretty much everything, so it seems like a good time to document it.

At the edge of my network is a Ubiquiti Networks EdgeRouter Lite (ERL).  It deals with all of my routing inside the network, as well as routing to the outside world.  It’s a 3 interface device – one to the outside world (cable modem), one to my default VLAN and home network, and the third interface is carved into a bunch of sub-interfaces for my VLANs in the lab.

The two internal-facing interfaces are attached to a Cisco SG300-20 that I could also use for routing, but I chose to let the router deal with that.  This is where I have several VLANs set up for my different environments, and that’s all I’ve done with the Cisco switch – no IGMP Snooping, no routing, just VLANs:

  • Local Management – this is where all of my common stuff lives – the vCenter for my physical hosts, vROps, Log Insight, etc
  • Production Management – this is where my GA-versioned vESXi hosts live, along with their relevant supporting pieces – vCenter, NSX Manager, etc
  • Production NSX Control – I set this up simply to have a dedicated network for my NSX 6.1 Controllers.  These could just as easily gone into my Production Management VLAN
  • Production NSX Transport – this is here to simulate a dedicated VXLAN transport network.  Currently, this is superfluous, as NSX 6.0/6.1 VTEPs don’t deal well with VLAN tagging in a nested environment.  Not sure what that’s all about, <sarcasm>I must be running in an unsupported config </sarcasm>
  • Production Management Branch – this network provides a simulation of a remote site
  • Production NSX Transport Branch – again, simulation of a remote site, but much like the Production NSX Transport, this one’s completely superfluous at the moment.
  • I’ve got a matching set of VLANs for my non-GA environment, so that I can have a stable and unstable environments and maintain some level of isolation.  

Since my lab is completely nested, I also have VSAN and vMotion VLANs configured on my distributed switches, but they don’t map to anything in the physical network.

On the NSX side of things, well, I’m rebuilding that right now.  My thought process, since this is a lab, is to attach my outside-facing Edge VMs to the relevant Management network, depending on where I need the Edge.  This sort of flies in the face of having a dedicated Edge cluster, but hey, this is a lab 🙂  

Inside the Edge, my DLR(s?) will attach to a common Transit network, as will the inside interfaces of the Edges.  I’ll set up some OSPF areas so that the EdgeRouter Lite can advertise some networks into the Edge.  The DLR will also advertise its routes up to the Edge, which will in turn advertise back to the ERL.  This should be a pretty simple OSPF config.  I could eliminate the need for OSPF between the Edge and the ERL simply by configuring a default route, but what fun is that?

Then my workloads will attach to whatever Logical Switches I want them attached.  The sky’s the limit inside the SDN.  

For simplicity’s sake at this point, each network segment (VLAN or VXLAN) will have its own /24, though many of them could make due with a /28 or /29 pretty easily.  But I’m not strapped for IP addresses, thanks to our friend RFC 1918, so I’m not going to make things any more complicated than I need to.  

Everything works pretty well.  Sure, I run into some goofy behavior once in a while (see the VTEP VLAN tagging thing above), but this environment is entirely unsupported.  Honestly, it’s a miracle that any of this works at all, and is a galvanizing testament to what VMware software is actually capable of doing.  

Someday, maybe I’ll draw this all up.  But today is not that day.  

New Lab Server

Here I am, procrastinating on other stuff, to talk about the new lab setup.  I promised in the last video, I’d do a writeup, and I figured “no time like the present”!

So what do I have going on?  I’ve ripped out the ML370 and ASUS RS500A boxes, and replaced them with a veritable steal from the Dell Outlet.  I decided to go all-in for a nested lab, since I can’t come up with a good reason to put together a physical lab.

So I found a Precision T5610 with a pair of Xeon E5-2620v2s.  Twelve hyper threaded cores of processor get up and go.  The Scratch and Dent unit I bought had 32 GB of RAM installed, along with a 1 TB spindle.  Not a bad start.  But I had gear to work with, and needed more RAM.  

So I ordered a nice 64 GB upgrade kit from Crucial (well, 4 16 GB kits, technically, hoping it’d give me a 96 GB box to work with.  The pre-installed RAM and the Crucial RAM didn’t play too nicely together (Windows wouldn’t load from the spindle, nor would the ESXi installer start).  Boo.  So I pulled out the factory RAM, ran memtest86 for about a day, just to be safe, and am proceeding, for the moment, with 64 GB.

Still just a start, though, as I needed storage.  I had an Icy Dock 4-bay SATA chassis and an IBM M1015 SAS RAID controller in my little HP Microserver.  That box didn’t need those things anymore, so a transplant was necessary.  4 screws later, I had lots of room for 2.5” SATA drives.  I already had a pair of 120 GB Intel 520 SSDs in Icy Dock trays, and I pulled the 2 1 TB Crucial M550 SSDs from the ASUS box.  Now I have plenty of lab storage.  If I need more, I can always take the performance hit and attach something from the DS412+ (like I’ve already done with my “ISO_images” NFS share.

**EDIT** I ran into another snag.  The LSI controller and Icy Dock combination seem to not be playing nicely with the host.  The SSDs seem to randomly just drop offline periodically, which makes me sad.  It could be a power thing (these big SSDs are kind of notorious for power problems, especially in small drive chassis or NAS units), but I’m not going to push it any further.  I pulled the controller and drive cage out of the system, and I should have a SATA power splitter after UPS shows up today (I was too lazy to leave the house LOL), so I’m just going to run the SSDs off the on-boad SATA controller channels, and be happy about it.  

At this point, I thought I was ready for ESXi, but upon installation, I hit a snag.  The T5610 has an Intel Gigabit NIC.  As such, I expected no issues, but the 82579 isn’t noticed by ESXi 5.5u2 for whatever reason.  No biggie – this thing has a nice tool-less case, and less than a minute later, I had a dual-port Intel NIC installed and ready to go (82571EB if you’re curious).  One more reboot and ESXi was installing.

Everything’s pretty happy at the moment.  Here’s what it looks like now that I’ve built up all my virtual ESXi hosts:

Screenshot 2014 09 24 08 47 22


Screenshot 2014 09 24 08 48 53


Oh, and the “Remote_External” cluster is a set of ESXi virtual machines I have running in VMware Workstation on a Precision M4800 laptop.

I’ll follow up with some network details shortly, since that’s also gotten _way_ complex recently.  All in the name of scenario-based play with NSX. More fun later!

-jk